I began writing up my family history about twenty years ago. I wanted to turn my research into a story which included something of what life might have been like for my ancestors. One driver for this was an eager audience within my family who, I suspected, would be quickly bored by a list of dates and places.
I had a dilemma. If I wrote up my story and continued my research I would have to keep modifying it, on the other hand if I just continued my research I would never start writing. I thought a lot about how to overcome this, consulting books on the subject and looking at how others had written their family history. Eventually I decided on an approach that has proved to work well for me. New ideas have been incorporated but the original basis still holds good. This article describes my approach, which hopefully you may find useful, or at least provide ideas for your own approach.
Step 1 – Structuring the book
My family history book is made up of several chapters. These chapters are composed of sections, where each section is about a person.

Structure:
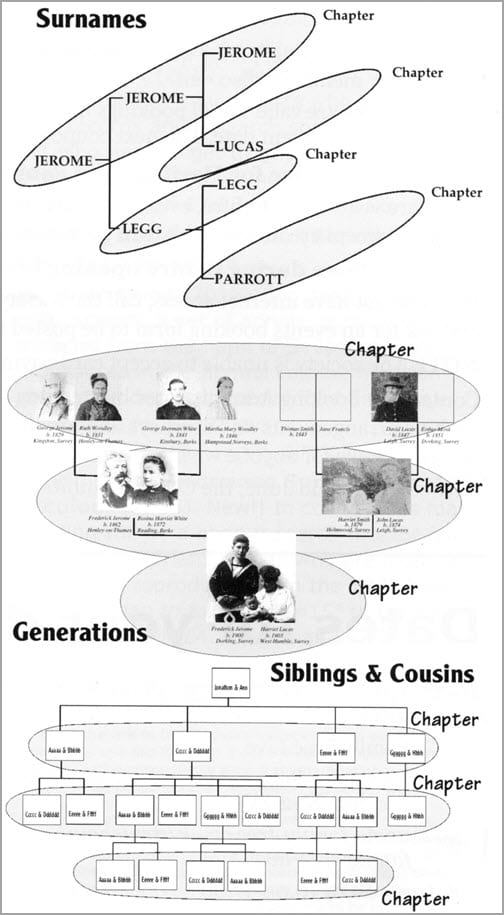 One of the first tasks is to choose what will be the contents of each chapter i.e. how will the individual sections be brought together into a chapter.
For example, there could be a chapter for each surname being researched, or a chapter about everyone in a particular generation e.g. parents, grandparents, great-grandparents, or a chapter about siblings and cousins in a family tree.
I have used surname chapters giving the following structure to my family history book:
Chapter 0 Introduction containing
family tree diagrams
Chapter 1 Jerome
Chapter 2 Legg
Chapter 3 Lucas
etc.
Each chapter consists of many sections, one for each individual, where each individual has the same surname. A chapter based on surnames does not have to only contain a direct ancestor; it could include sections for siblings in a family as well.
Volumes and Binding:
There could be just one, or more likely, several bound volumes making up the Family History book .
A volume is part of the family history, bound separately, to make it more manageable for reading and distributing.
Examples of binding the sections (individuals) together into volumes:
All chapters bound together into one volume => A single volume book
Each chapter bound separately as a volume => Book consists of bound chapters
Several or one large section bound as a volume => Each chapter consists of several bound sections
Preparation for writing:
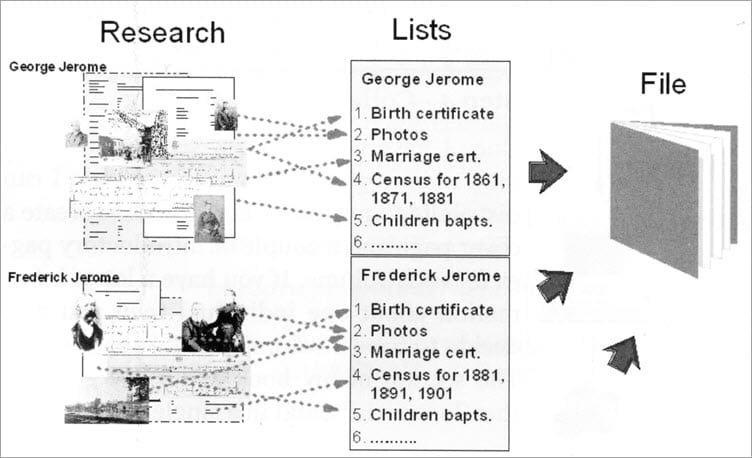
To be able to start writing you need to know what information you have about each individual. This information will be what you will write about in each section.
I go through my research and pull out a list of the type of information I have for each individual e.g. birth, census, marriage, family, jobs, residences, death.
Step 2 – Writing the Story
The next question is where to start? With the book broken down into small sections the overall task did not seem so daunting, but which section should I write first? Should I start from my oldest discoveries or start with recent family members? It does not really matter – the most important thing I found was to start on a section which I would be enthusiastic about finishing.
What do I write?
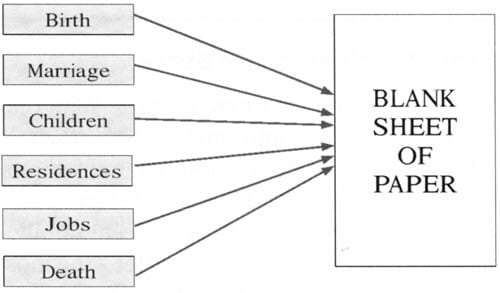
That blank computer screen, or sheet of paper, can seem quite daunting. To overcome this I have adopted a mechanistic approach to getting some words on the paper or screen. I modify the words later to make it into a more readable narrative.
First I take the list of all the information I have about the individual. and also try to gather information about the lifestyle that the individual would have experienced.
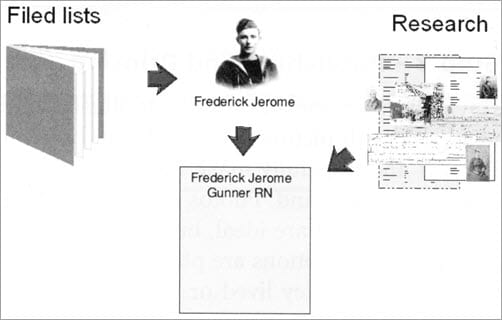
I then put a heading relevant to the person I have chosen. In my example “Frederick Jerome – Gunner RN” (my grandfather).
Using standard sentences
I use a standard sentence approach to fill in the blank screen. These standard phrases would not win a literary prize, but they are a way of starting the story without too much effort. The exact words are refined later as more information is woven into the story.
A standard sentence may just say for example:
“Frederick Jerome was born on 18th January 1900, the eldest son of Frederick and Rosina (nee White)”
Step 3 – Publishing and Printing
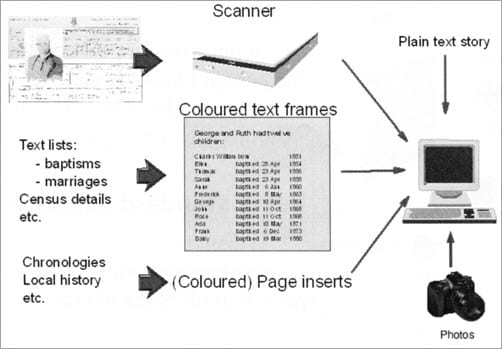
Having written the story, I like to illustrate the plain text with pictures. This helps to break up the text and hopefully make the story easier to read and understand. Photos of the individual I am writing about are ideal, but this is often not possible. Other options are photos of places, for example where they lived or worked. These do not have to be old photos, a modern photo of the village church taken during a research trip can be just as useful. I also include coloured text frames to break up the plain text.
How do I make my story look like a book?
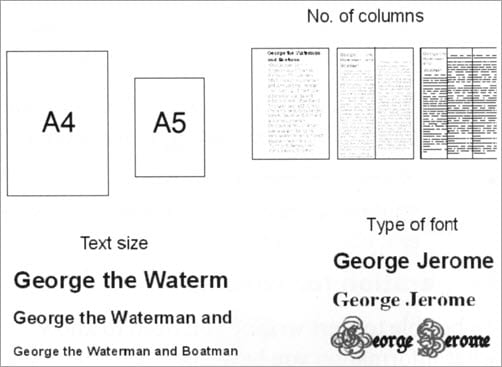
One of the most important considerations is consistency between each section in a chapter. This includes deciding on the size, format and layout of the pages, using font types consistently and using the same heading styles.
This decision is partly your own preference, but also consideration of who is your target audience to read your story. What size paper e.g. A4 or A5? What size font – larger fonts for an older audience?
Step 4 – Collating and Binding
 Once I have written a few sections I like to bind them together into a volume that I can distribute to my family and friends. I create a cover page and a couple of introductory pages for each volume. If you have a lot of information about one individual then you may decide to have a volume just for that person. The section of my book about my grandfather Jerome is bound in a single volume.
Binding options
The final stage is binding the pages. Numerous bindings are available, I started with a simple plastic strip to hold pages together. I now use comb binding having invested in a binding punch which I have been using for a number of years. For me it was worth the extra initial cost as I think it presents the story in a way that looks good and the volume is easy to handle. It is now ready to send to my family and friends.
DIY or commercial printing and
binding?
I have always printed and bound the volumes of my book. Commercial printing is an option but can be expensive for short runs, and also it is best left until you are sure that you will not want to update that volume within the foreseeable future.
Other ways of publishing
Printing is not the only way of publishing your family history book. I have also sent it out as pdf files on a CD so that it can be read on a computer. A presentation may be a good option for a family re-union. A website is another option I have begun. I do not publish it on the internet however, but distribute it to family and friends.
